
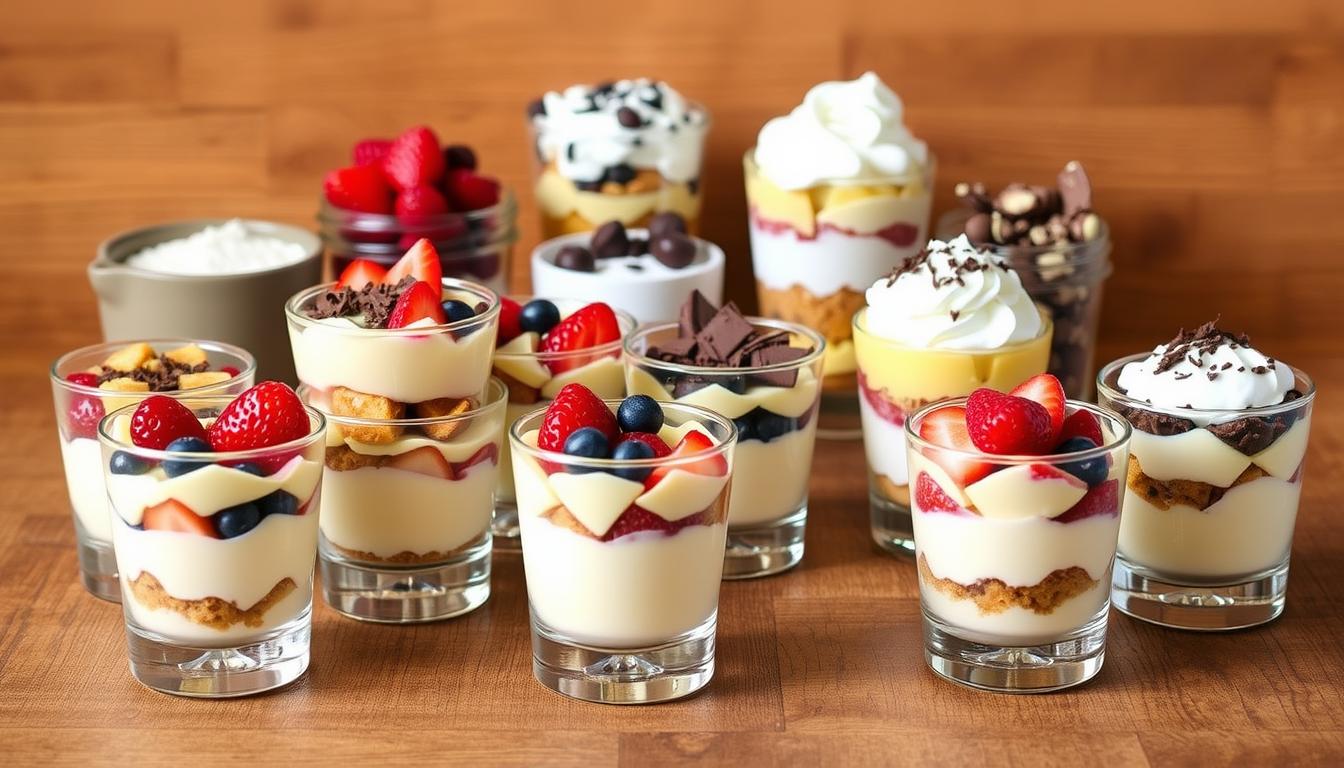
Imagine turning your kitchen into a dessert paradise with just a few ingredients. Dessert cup recipes are your secret to making stunning treats. They impress everyone without taking hours to make.
These easy individual desserts are great for those who want tasty results without hard work. You’ll learn how to make no-bake delights and quick chocolate puddings. It’s easy to make desserts that look like they came from a restaurant.
Whether you’re a busy parent, a beginner baker, or a sweet treat lover, these recipes will change your dessert game. With only three ingredients, you’ll make delicious cups that look and taste amazing.
Key Takeaways
- Create delicious desserts in under 30 minutes
- Use minimal ingredients for maximum flavor
- Perfect for parties and quick sweet cravings
- No advanced baking skills required
- Versatile recipes for various dietary needs
- Impressive presentation with minimal effort
Essential Kitchen Tools for Creating Perfect Dessert Cups
Making delicious dessert cups needs the right kitchen tools. Whether you’re making simple handheld desserts or complex treats, the right tools are key. They can change your cooking experience.
Choosing the right tools is the first step in your dessert cup journey. You need versatile and precise tools to make your desserts look amazing.
Types of Cups and Molds
Choosing the right containers is key for great dessert cups. Here are some options:
- Mini muffin tins (18-count recommended)
- Silicone molds with various shapes
- Disposable plastic dessert cups
- Glass parfait glasses
- Ramekins for individual servings
Must-Have Utensils
Stock your kitchen with these essential tools for making handheld desserts:
- Whisks for smooth mixing
- Spatulas (silicone and metal)
- Piping bags with various tips
- Measuring cups and spoons
- Mixing bowls in different sizes
Storage Containers
Proper storage keeps your dessert cups fresh and tasty. Get airtight containers with tight lids to keep texture and flavor. Stackable containers save fridge space and protect your desserts.
Pro tip: Always chill your dessert cups in clean, sealed containers to maintain their quality and prevent flavor absorption.
Understanding Base Ingredients for No-Bake Dessert Cups
Making no-bake dessert cups is all about the right base ingredients. These desserts use simple parts to turn basic items into amazing treats. Choosing the right base is key to making your no-bake dessert cups a hit.
Mastering a few essential base ingredients is crucial for perfect no-bake dessert cups. Here are the must-haves:
- Graham cracker crumbs (2 cups or 240g)
- Melted butter (1/2 cup or 8 tablespoons)
- Brown sugar (1/3 cup or 67g)
These ingredients make a strong and tasty base for many no-bake dessert cups. Mixing them creates a solid base that goes well with your filling.
| Ingredient | Quantity | Purpose |
|---|---|---|
| Graham Cracker Crumbs | 2 cups | Provides crunchy base texture |
| Unsalted Butter | 1/2 cup | Binds crumbs together |
| Brown Sugar | 1/3 cup | Adds sweetness and depth |
Tip for easy individual desserts: Use about 1½ tablespoons of crust mix for each cup. This balances the crust and filling well. Chill for 3 hours to set, and they last up to 5 days in the fridge.
Try different base ingredients to find your favorite no-bake dessert cup recipe!
Quick Chocolate Pudding Cup Creation
Making delicious pudding cup desserts is an art. It’s simple yet indulgent. Layered dessert cups are a great way to enjoy sweet treats with little effort.

Your chocolate pudding adventure starts with picking the best ingredients. The secret to amazing pudding cups is using top-notch chocolate and knowing the right methods.
Choosing the Right Chocolate
For the best taste, choose chocolate with 60-65% cocoa. Here are some great options:
- Semisweet chocolate (recommended 1/2 cup)
- Bittersweet chocolate chips
- Dark chocolate bars
Layering Techniques
Creating stunning layered dessert cups needs skill and creativity. Follow these steps for beautiful results:
- Crush cookies as a base layer
- Carefully spoon pudding into glasses
- Fill containers 3/4 full
- Create distinct layers
Topping Ideas
Make your pudding cups even better with these toppings:
- Fresh berries
- Whipped cream
- Crushed nuts
- Chocolate shavings
“The secret to perfect pudding cups is in the details and presentation!” – Pastry Chef
Pro tip: Chill your pudding cups for 2-3 hours. This helps get the perfect texture and prevents skin.
Easy Fruit Parfait Cup Assembly
Making fruit parfait recipes is simple! They mix fresh fruits, creamy yogurt, and crunchy granola. This makes a dessert that’s both healthy and tasty.
- 1 cup diced fresh strawberries
- 2 cups mixed berries (blackberries, raspberries, blueberries)
- 3 cups honey-vanilla Greek yogurt
- 1 cup granola
- Optional: honey or maple syrup for additional sweetness
Layering your parfait is like creating a work of art. Start with a layer of granola at the bottom. Then, add a scoop of yogurt and a mix of colorful berries.
| Ingredient | Quantity | Nutritional Value |
|---|---|---|
| Yogurt | ⅓ cup | 212 calories, 9g protein |
| Mixed Berries | ¼-⅓ cup | 57mg Vitamin C, 6g fiber |
| Granola | 2-3 tablespoons | Adds crunch and texture |
Pro tip: Make parfaits ahead of time! You can double the recipe and keep it in the fridge for up to 5 days. They’re great for quick breakfasts or desserts.
Try different fruits and yogurt flavors to make your own perfect parfait!
Three-Ingredient Peanut Butter Cup Delights
Explore the world of dessert cups with these easy sweets. They’ll satisfy your sweet tooth quickly. Peanut butter cups are a favorite treat that’s simple to make at home.
To make tasty peanut butter cups, you need just three things: creamy peanut butter, powdered sugar, and dark chocolate. This recipe is quick and fun to make.
Melting and Molding Tips
Here are key tips for the right texture in your dessert cups:
- Use a double boiler or microwave to melt chocolate in 30-second intervals
- Stir chocolate consistently to prevent burning
- Choose dark chocolate with a high percentage of cocoa solids for enhanced flavor
Texture Enhancement Methods
Make your sweets even better with these tips:
- Chill peanut butter filling before adding to chocolate cups
- Use powdered sugar for a smoother filling consistency
- Consider adding crushed nuts or graham cracker pieces for extra crunch
Storage Guidelines
| Storage Method | Duration | Recommended Conditions |
|---|---|---|
| Refrigerator | Up to 1 week | Store in airtight container |
| Freezer | Up to 1 month | Wrap individually in plastic wrap |
Each batch of homemade peanut butter cups makes about 6 treats. They’re ready in just 13 minutes. Pro tip: Chill them in the fridge for 5-10 minutes for the best texture.
Simple Dessert Cup Recipes for Beginners

Making delicious dessert cups is easy. Beginners can learn to make these simple desserts with just a few ingredients and little time.
Begin with these easy recipes that need no special skills. Focus on simple steps and tasty flavors to boost your confidence in baking.
- Choose ingredients you already have in your pantry
- Use minimal cooking equipment
- Follow step-by-step instructions carefully
Here are three easy dessert cup recipes to start with:
- Classic Chocolate Mousse Cup
- 3 ingredients: chocolate, heavy cream, powdered sugar
- Preparation time: 15 minutes
- Chilling time: 1 hour
- Creamy Tiramisu Cup
- 5 ingredients: mascarpone, ladyfingers, coffee, cream, cocoa powder
- No baking required
- Serves 4-6 people
- Oreo Cheesecake Cup
- 24-26 Oreo cookies
- Cream cheese base
- Quick assembly in individual cups
These recipes are great for beginners. As you get better, try new flavors and decorations to make your desserts special.
Pro tip: Invest in clear glass cups to showcase your beautiful dessert layers and impress your guests!
Remember, practice makes perfect. Don’t be afraid to try new things and have fun making these delightful desserts.
Make-Ahead Dessert Cups for Parties
Hosting a party doesn’t mean you have to spend hours in the kitchen. Make-ahead dessert cups are perfect for stress-free entertaining. They let you prepare tasty treats ahead of time, so you can enjoy your guests more.
Preparation Timeline for Perfect Party Desserts
Planning is crucial for make-ahead dessert cups. Most can be made up to two days before your event. Here’s a quick guide to help you prepare:
- 2 days before: Prepare base layers and set in refrigerator
- 1 day before: Add middle layers and toppings
- Day of event: Final garnish and presentation
Creative Decoration Techniques
Make your dessert cups stand out with these decoration tips. Use piped whipped cream, fresh fruit, chocolate shavings, or edible flowers. Individual portions let you add personal touches that will wow your guests.
Transportation Tips for Dessert Cups
When moving dessert cups, plan carefully. Use strong containers with tight lids. Place them in a cooler or insulated bag to keep them fresh. Wrap each cup in plastic wrap for extra safety.
“The secret to great party desserts is preparation and presentation!” – Professional Pastry Chef
With these tips, your make-ahead dessert cups will be the star of any party. They’re perfect for summer barbecues or fancy dinner parties. These handheld treats are convenient and delicious.
Creative Variations for Basic Dessert Cup Recipes
Turn simple dessert cups into amazing treats by trying new flavors and techniques. Layered dessert cups are perfect for showing off your creativity in the kitchen.
Begin by swapping out ingredients to make your dessert cups stand out. Here are some cool ideas:
- Try sugar-free white chocolate instead of regular chocolate for a lighter taste
- Add unique flavors like lavender or matcha to your dessert cups
- Use ingredients like sea salt caramel or passion fruit for a twist
- Combine crunchy cookie crumbs with smooth mousse for a fun texture mix
Creating memorable dessert cups is all about balance and looks. Mix contrasting elements that work well together, such as:
- Pair tangy cream cheese with rich chocolate
- Match citrus zest with creamy custard
- Combine nutty praline with smooth vanilla cream
Seasonal ingredients can also make your dessert cups special. Use fresh berries or tropical fruits in summer. In autumn, add pumpkin spice or apple cinnamon for warmth.
Pro tip: Always taste your combinations before finalizing to ensure a harmonious blend of flavors!
Even with dietary restrictions, you can still be creative. Many dessert cup recipes can be made gluten-free, dairy-free, or vegan by swapping out key ingredients.
Healthy Alternatives in Dessert Cup Making
Making sweets in cups doesn’t mean you have to give up taste or fun. You can make your favorite treats healthier by swapping ingredients and using new techniques.
Sugar-Free Sweet Solutions
It’s easy to cut down on sugar in your dessert cups. Natural sweeteners can make your treats sweet without adding calories:
- Stevia: Zero-calorie plant-based sweetener
- Monk fruit extract: Natural, zero-calorie option
- Erythritol: Low-calorie sugar alcohol
Dairy-Free Delicious Alternatives
Plant-based ingredients can make your dessert cups creamy and rich, without dairy:
- Coconut milk: Rich, smooth base for mousse
- Almond milk: Light, nutty flavor profile
- Cashew cream: Thick, luxurious texture
Gluten-Free Ingredient Innovations
Exploring gluten-free ingredients can lead to exciting new dessert cup recipes:
- Almond flour: Nutrient-dense replacement
- Coconut flour: High-fiber alternative
- Oat flour: Versatile gluten-free option
“Diet-friendly desserts can be just as delicious as traditional recipes!” – Culinary Nutrition Expert
With these alternatives, you can make portion-controlled sweets that are both tasty and healthy.
Seasonal Ingredients for Dessert Cups
Make your dessert cups special by using seasonal ingredients. Each season brings new flavors that can make your fruit parfaits stand out. Using local produce lets you create vibrant, fresh dessert cups that celebrate nature’s gifts.
Seasonal ingredients have many benefits for your dessert cups:
- Peak flavor intensity from fresh, ripe produce
- Lower ingredient costs during harvest periods
- Enhanced nutritional value of recently picked fruits
- Unique taste experiences that change throughout the year
Spring brings strawberries and rhubarb, great for light dessert cups. Summer is full of juicy berries like blueberries, raspberries, and cherries. Autumn offers pumpkin and apple for warm flavors. Winter brings citrus and pomegranate for tangy dessert cups.
To use seasonal ingredients well, try these tips:
- Freeze fresh berries at peak ripeness
- Make fruit compotes for extended use
- Dehydrate seasonal fruits for year-round enjoyment
- Can or preserve fruits for future dessert cup recipes
Your local farmers market is a great place to find fresh produce. Be adventurous and let the flavors of each season guide your dessert cup creations.
Troubleshooting Common Dessert Cup Issues
Making perfect dessert cups can be tough, even for experts. No-bake dessert cups sometimes face problems that can upset even the best bakers. Knowing common issues helps you avoid problems in your cooking.
Here are the most frequent challenges you might face when preparing dessert cups:
- Ingredients not setting properly
- Uneven layering
- Texture inconsistencies
- Temperature-related complications
Temperature is key in making dessert cups. If your coconut butter or other temperature-sensitive ingredients are too solid, you’ll need specific techniques to manage consistency. For example, microwaving or placing the ingredient jar in hot water can help achieve the right texture.
| Issue | Solution |
|---|---|
| Filling Too Runny | Add more gelatin or refrigerate longer |
| Layers Mixing | Chill between layers for 15-20 minutes |
| Hard Ingredients | Warm gently or use room temperature components |
“Mistakes are proof that you’re trying and learning in your dessert cup journey.”
Remember, practice makes perfect with dessert cup recipes. Don’t get discouraged if your first attempts aren’t flawless. Each challenge is a chance to get better at making no-bake dessert cups and grow your cooking skills.
Conclusion
Your journey through handheld dessert ideas has opened a world of creativity. You’ve found over 35 dessert cup recipes that take less than 30 minutes to make. These treats are sure to impress with their taste and look.
These easy individual desserts are very versatile. They’re perfect for a quick snack or a fancy party dessert. You can find recipes for everyone, no matter your skill level or dietary needs. There are even no-bake and gluten-free options to make your desserts special.
Dessert cups are more than just treats; they’re a way to express yourself. Try new flavors, get creative with how you present them, and feel free to change recipes to your liking. With only 3-5 ingredients per recipe, you can make delicious desserts that wow your loved ones.
Keep making desserts and enjoy the process. Each dessert cup is a chance to try new things, be creative, and enjoy the yummy results of your hard work.
FAQ
How many ingredients do I need to make most dessert cups?
Can I make dessert cups in advance?
What type of containers work best for dessert cups?
Are dessert cups suitable for people with dietary restrictions?
How long can I store prepared dessert cups?
Do I need special baking skills to make dessert cups?
Can I customize dessert cup recipes?
What are the best tools for making dessert cups?
Are dessert cups good for portion control?
What are some quick no-bake dessert cup ideas?
Try Thes Recipes Next!
if you’re looking for more delicious recipes, check out our guide for another
crowed-pleasing dish